Tag Manager
Tags help you organize and categorize your Contacts. Unlike Segments, Tags are labels you manually assign to Contacts. You can add or remove them anytime. Use Tags to mark Contacts based on characteristics, behaviors, or other criteria that matter to your marketing.
The Tag Manager is primarily for reviewing existing Tags in your Mautic instance and deleting Tags you no longer need. You can create Tags directly within any Tag input field. This includes editing a Contact, configuring a Campaign action, or setting up a Form action. Type a Tag name and press Enter. If the Tag already exists, you can select it. If it doesn’t exist, Mautic creates it automatically.
For details on Tag creation and other ways to work with Tags, see Tags.
Accessing the Tag Manager
Go to Contacts > Manage Tags to open the Tag Manager list page. This page shows all existing Tags with their names, descriptions, and Contact counts.
Creating a Tag in the Tag Manager
You can also create Tags directly in the Tag Manager:
Click the New button in the top right corner.
Enter a Name for the Tag. This is the only required field.
Optionally, add a Description to provide more context about when to use this Tag.
Click Save & Close to create the Tag.
This approach is useful when you want to add descriptions to Tags before assigning them, or when planning your Tag structure in advance.
Editing a Tag
Click on the Tag name in the list to open it.
Modify the name or description as needed.
Click Save & Close to apply changes.
Merging Tags
Merge duplicate or similar Tags to consolidate your Tag structure. Merging combines two Tags into one, transferring all Contacts and updating all references throughout Mautic.
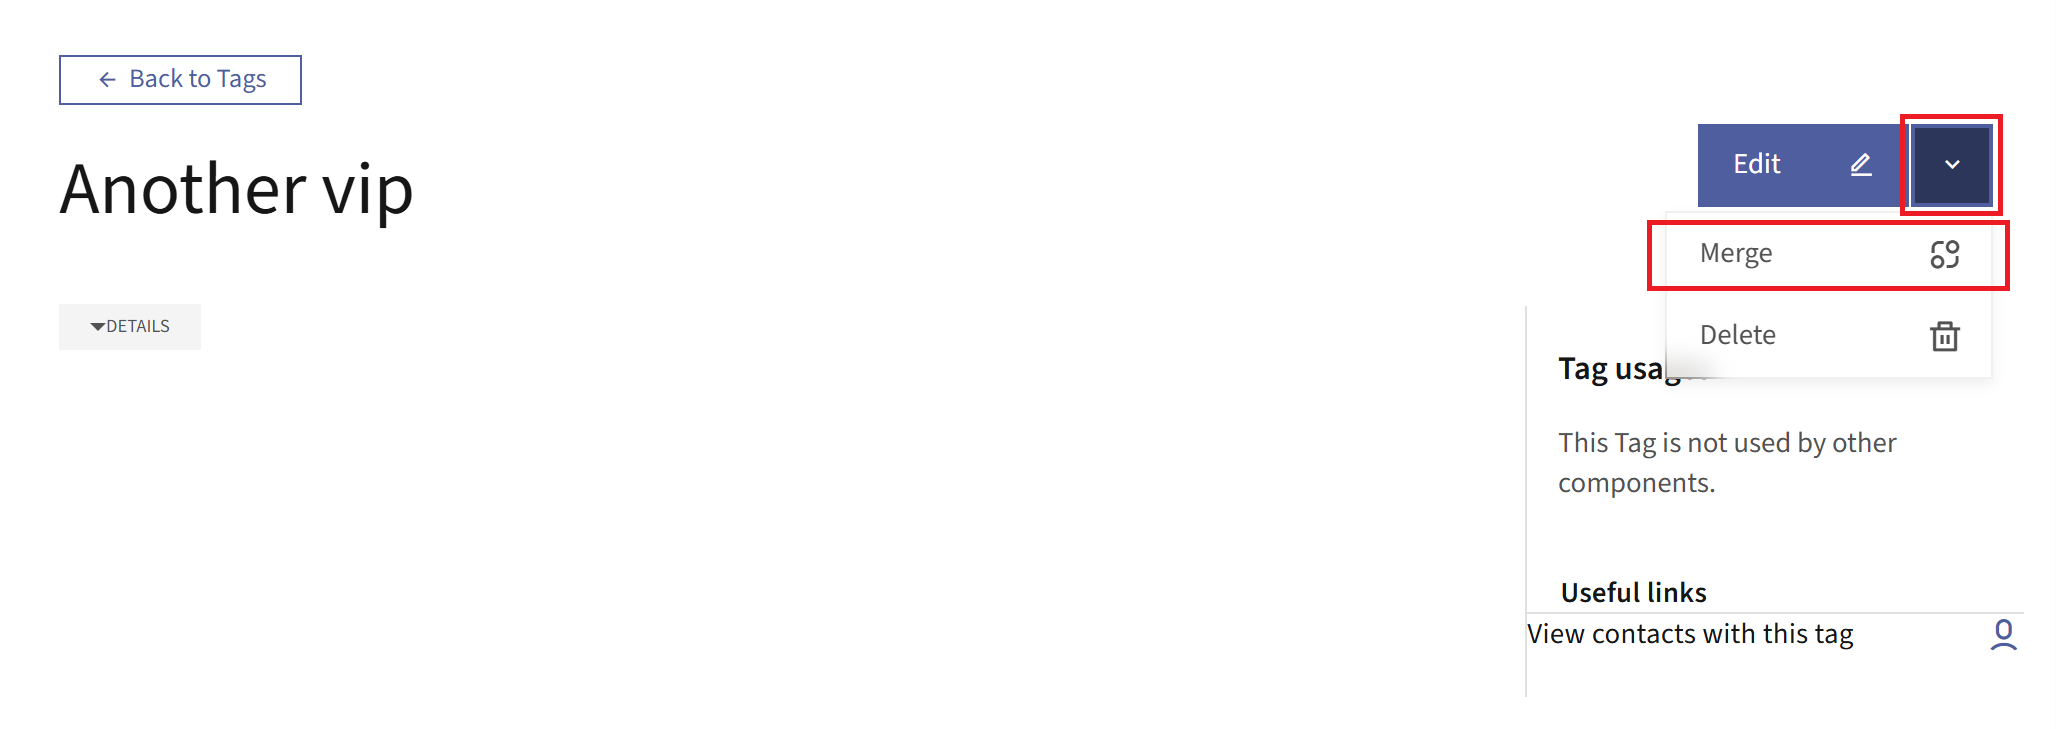
Click on the Tag you want to merge. Mautic deletes this Tag after merging.
On the Tag detail, click the dropdown arrow in the top right-hand corner.
Select the Merge option.
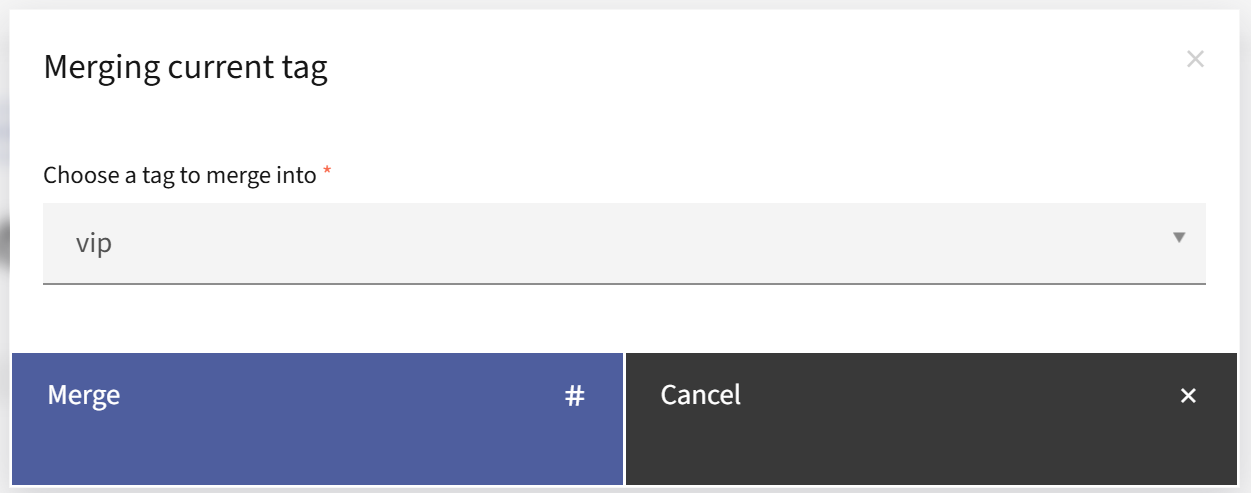
Once the pop-up window appears, type to search for the Tag you want to keep, then open the dropdown menu to select it. This Tag remains after merging.
Click the Merge button.
After merging:
All Contacts associated with the duplicate Tag move to the primary Tag.
References in Campaigns, Segments, Forms, Point Triggers, and Reports update automatically.
Mautic deletes the duplicate Tag.
Note
Merging Tags requires both edit and delete permissions for Tags. You can’t merge a Tag into itself.
Deleting a Tag
Select the checkbox next to the Tag you want to delete.
Click the dropdown arrow next to the New button and select Delete Selected.
Confirm the deletion.
Note
Deleting a Tag doesn’t delete the Contacts associated with it. The Tag is simply removed from those Contacts.